
1. Start a New Project by choosing New Project from the File menu or clicking the New Project ![]() icon on the toolbar.
icon on the toolbar.
2. The New Project dialog opens. Choose to create a JXEd Project (it is the only choice!). Click Next.

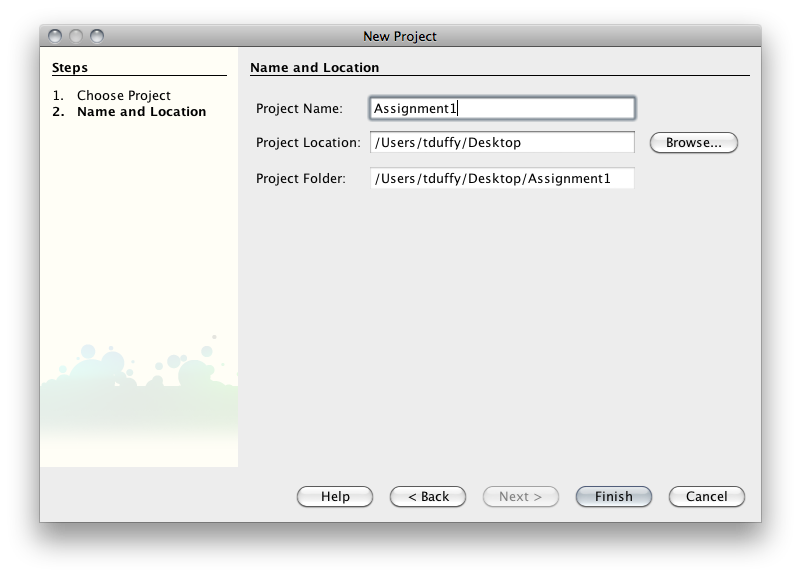
3. Name your Project. Choose a location to store your project. Click Finish.
4. JXEd will create the files for the project. The default project will create 3 files - a JavaScript file, an HTML file, and a CSS file.

5. Right Click the emptyScript.js file and choose Rename.
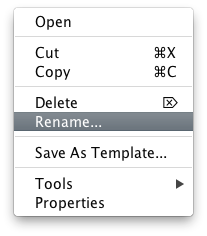
6. Give the file a meaningful name.

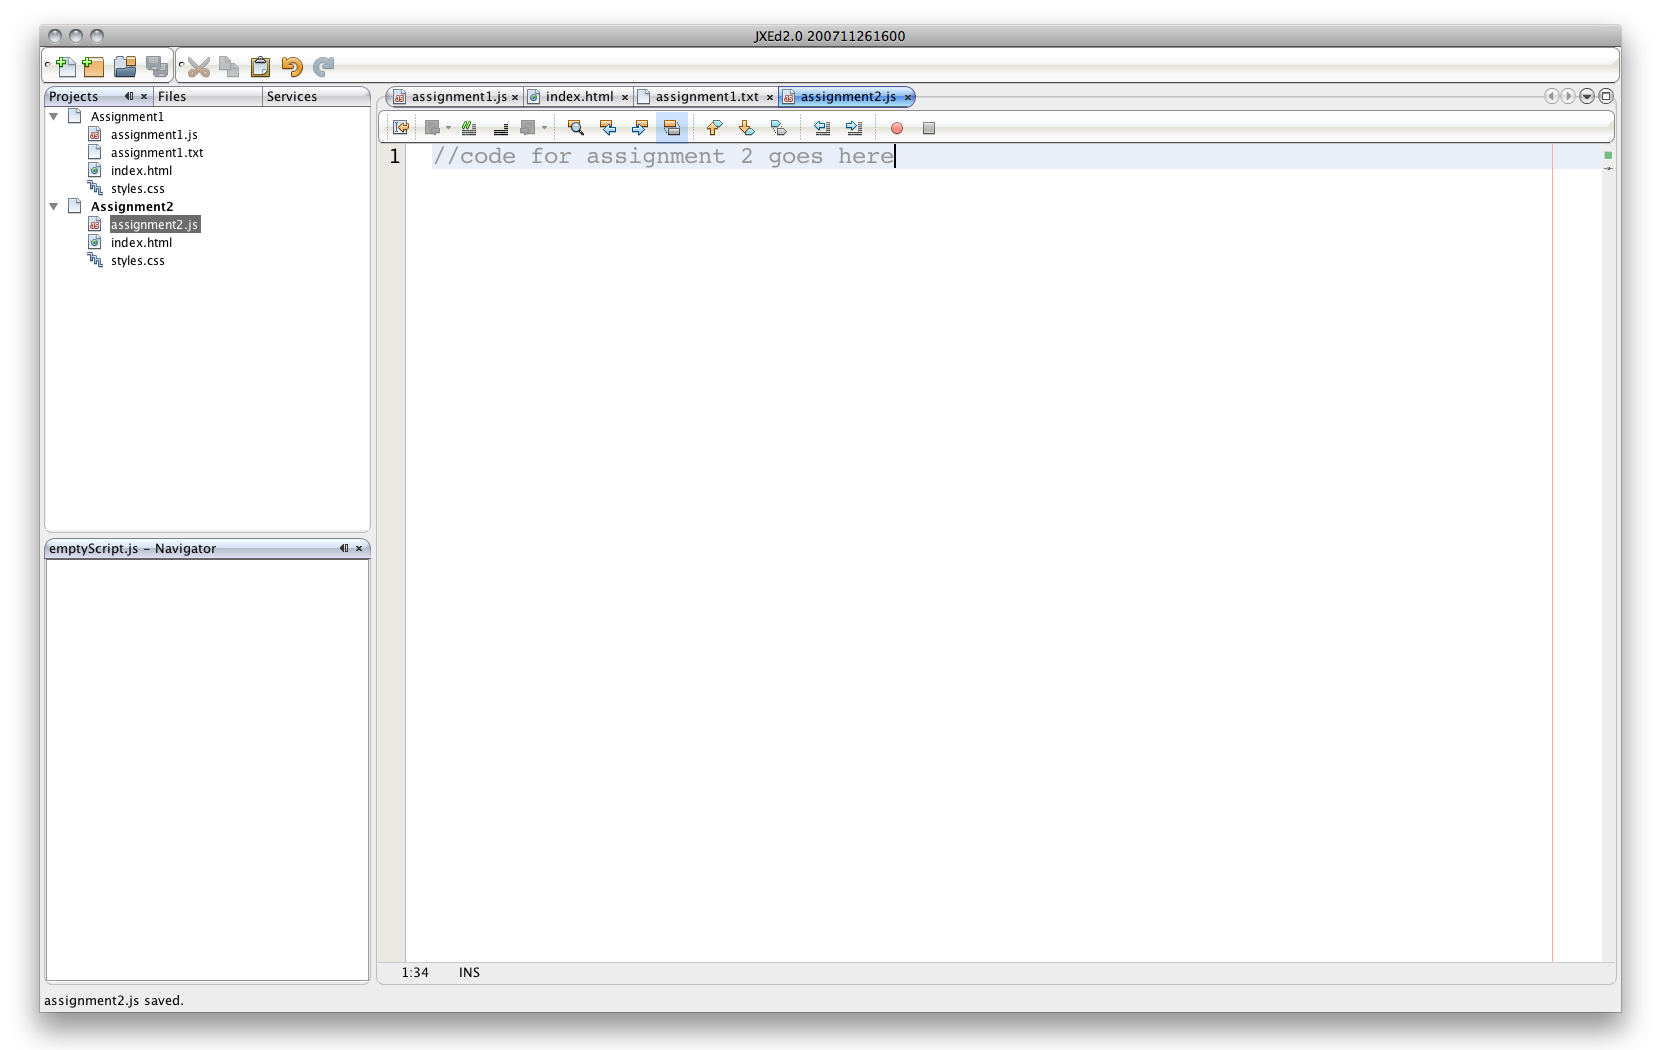
7. To edit any file, double-click it in the Projects tab. So, for example, when you double-click index.html, JXEd will open the file in the HTML editor.

8. JXEd includes editors for HTML, CSS, JavaScript, and many other files. The editors color your code based on what you enter. The editors will also help you with any errors in your code. In the above screen capture, the <script> element is unfinished. Note the yellow square in the gutter indicating a problem. Also note the red square in the gutter at the <body> tag. This indicates an error in the code. In this case, the <body> tag isn't allowed here because the <script> tag isn't finished.
9. JXED will also do some code-completion for you. That is, it will populate a list of possible completions for you as you type. To choose something from the list, simply click on it.
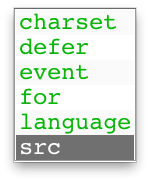
The above displays a list of the available attributes for a <script> element. Clicking on src inserts the src attribute into the tag.

Note: I added the value (assignment1.js) to the attribute.
10. The JavaScript editor will also color your code for you. You can use the coloring to help debug your code. Double-click the JavaScript file to open it in the editor.
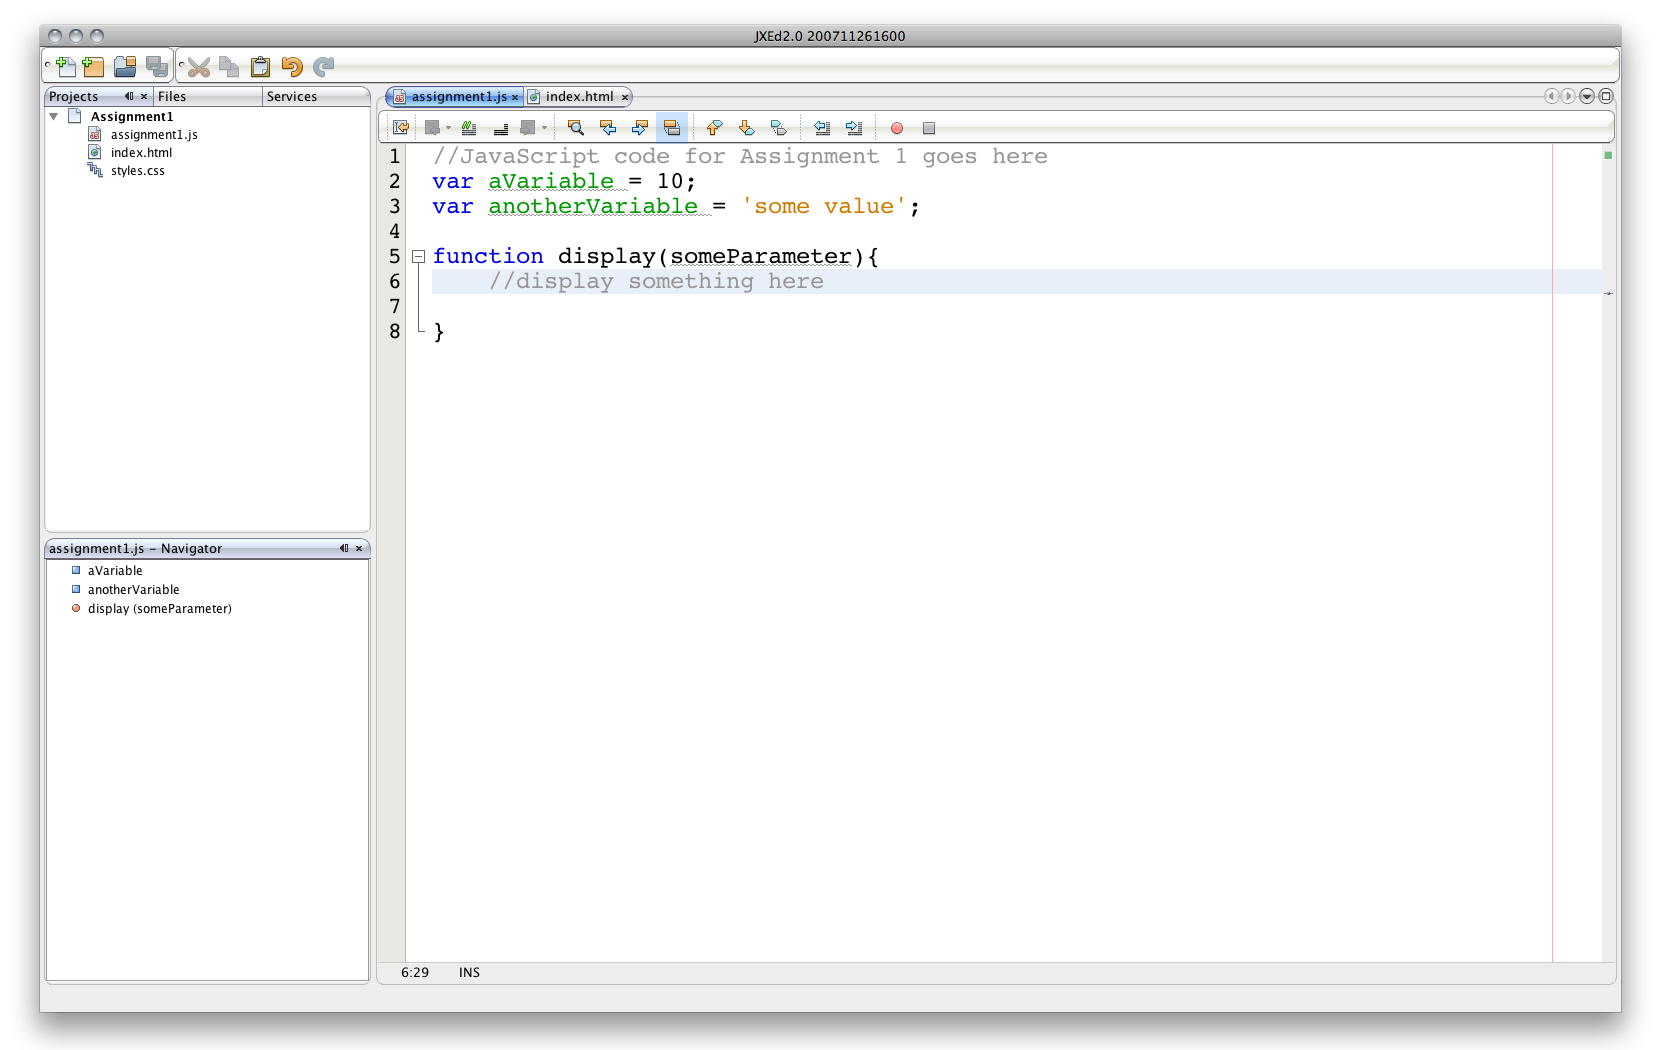
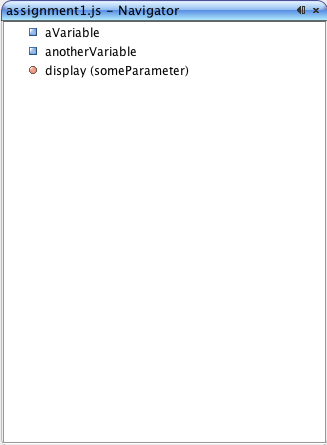
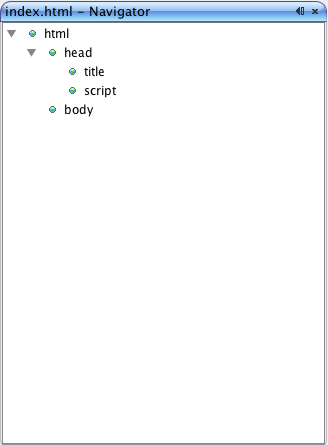
11. You can use the Navigator view to quickly locate code in longer files. The Navigator is smart - it will display the contents of the current file.
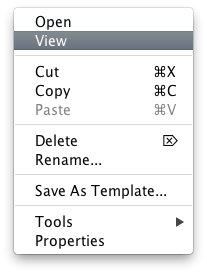
12. To run your JavaScript program, right-click the HTML file and choose View from the context menu.
13. This will load the file in your default browser.

14. When you want to create new files in your projects, right-click the project in the Projects tab and choose New >. JXEd will remember the last few types of files you've created. To see all of the available file templates, choose Other...

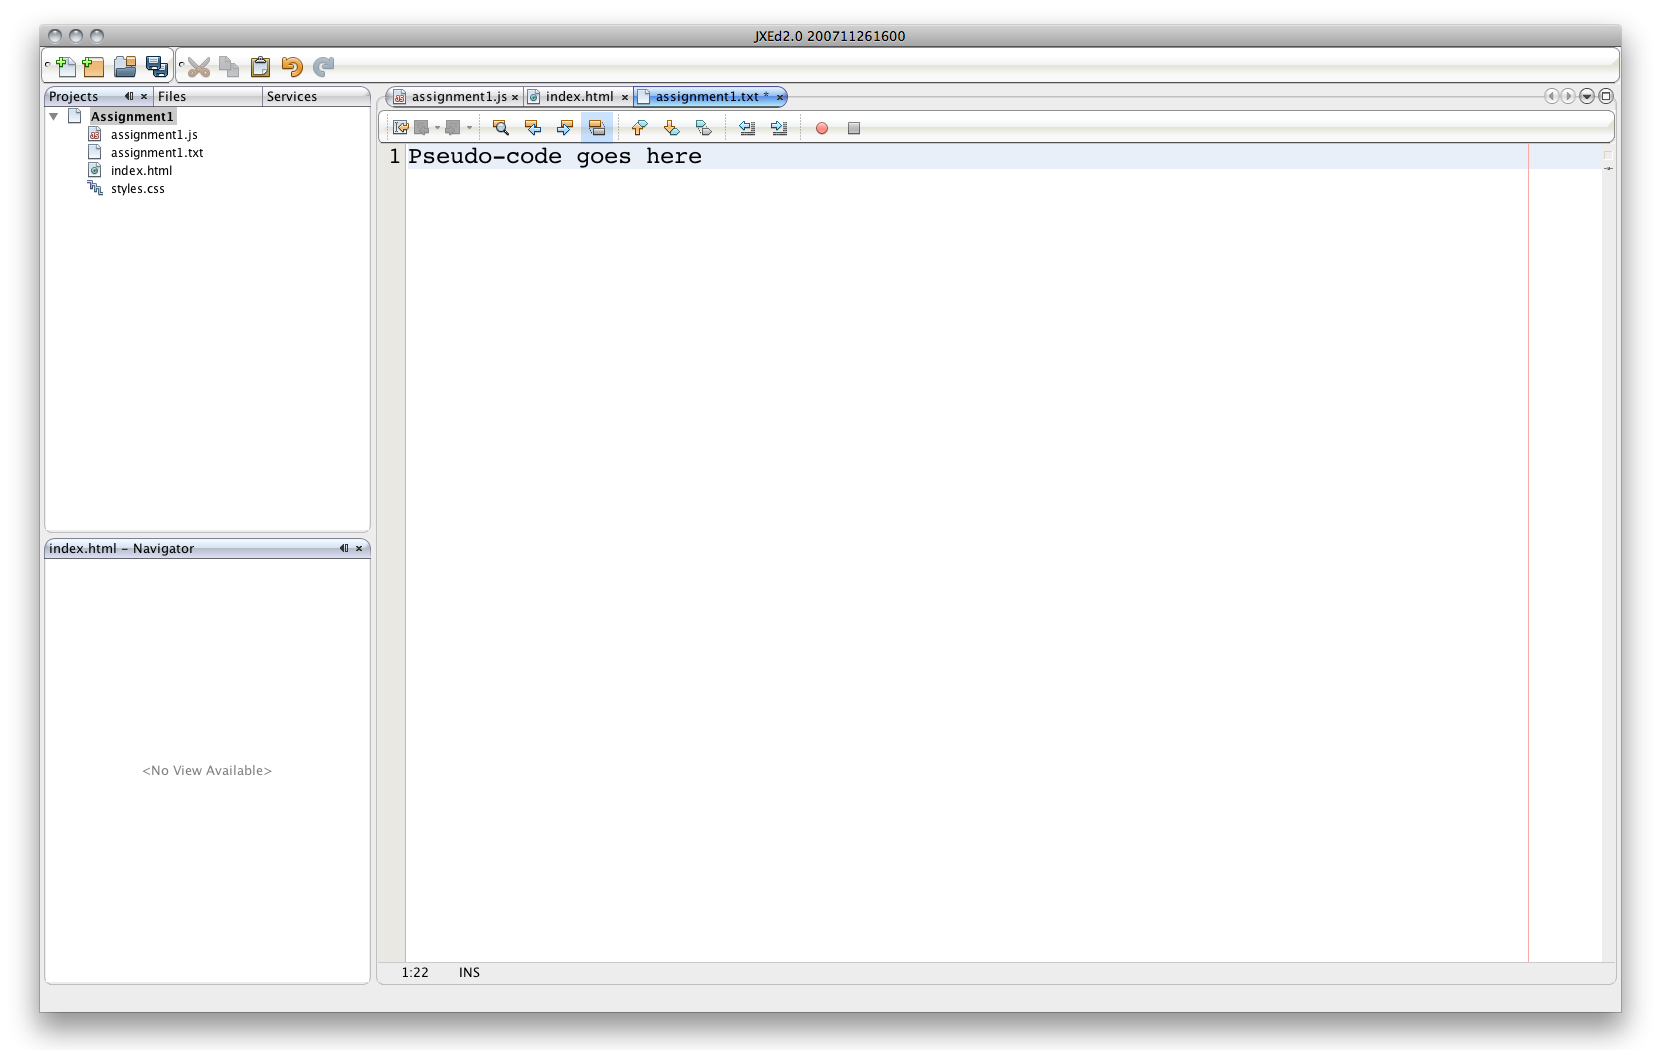
15. This opens the New File dialog. All of the available templates are available here. To create a text file (to use to write pseudocode, for example), click the Other node and choose the Empty File template. Click Netx.

16. Name your file. Note: for the Empty File template, you must include the extension! For pseudocode files, use the .txt extension.

17. The file will open in the appropriate editor based on which template you chose. Since I chose the Empty File template, JXEd will load the file in a basic text editor. Had I chosen another file type, such as an HTML or JavaScript file, JXEd would have used the correct editor based on the file type.
18. You can have multiple projects open in JXEd. Follow the steps above to create as many projects as you'd like. I recommend creating a separate project for each assignment.
This tutorial barely scratches the surface of all the features in JXEd. You can consult the Help files for more information.